


Its been a fantastic October for Sierra climbing this year and I had Mt Conness in my sights. After a successful but grueling climb of Middle Palisade, I still wanted to bag a few more before the passes close.
Mt Conness, at 12,589', is one of Yosemite's tallest mountains. Though not a 13er like Mt Lyell (the tallest), its more isolated and sports some incredible high altitude routes. You scarcely read of a miserable trip report up Mt Conness. Given this was my first foray into this part of Yosemite, I settled on climbing the easiest and most traditional route- the East Ridge/East Buttress. The route was fantastic, class III climbing with incredible exposure but good quality rock.

Mt Conness East Ridge/Buttress Route Overview
By most accounts, the East Ridge/Buttress is the shortest route up Mt Conness. Its standard class III climbing with a mercifully minimal amount of scree and boulder fields. There's one section of particularly significant exposure, however the rock and route quality remain consistently good. Route finding wasn't problematic for me but other accounts say differently. Most capable climbers finish this route in a full day but camping opportunities exist throughout the area. I dare say the climb was actually enjoyable.
Other routes exist including the infamously scenic North and West Ridges. The technically easiest route approaches from the South near Tuolumne Meadows, via Young Lakes.
Approach
With an alpine start, I began a lovely hike from the Sawmill Campground, just off the Saddlebag Lake Road. This road to the parking lot unpaved but fairly good quality- I doubt most vehicles would have trouble.
Sawmill Campground is a walk-in campground that extends nearly 1/2 a mile along a well-established dirt trail. I followed the trail through the campground and easily picked up the use trail that heads towards Lee Vining Creek. A crude but solid crossing was constructed over the creek.
After roughly 1.2 miles of easy hiking, I crossed by the Carnegie Institute Experimental Station, marked by a sign and a very decrepit cabin. I felt like the first visitor in years.


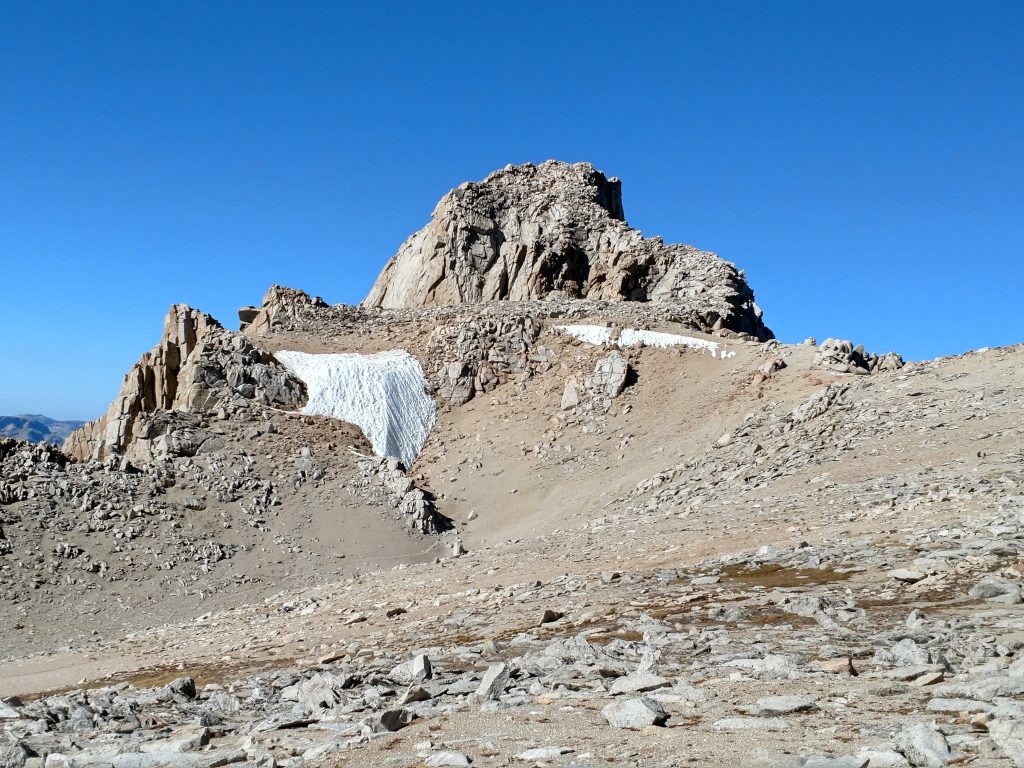
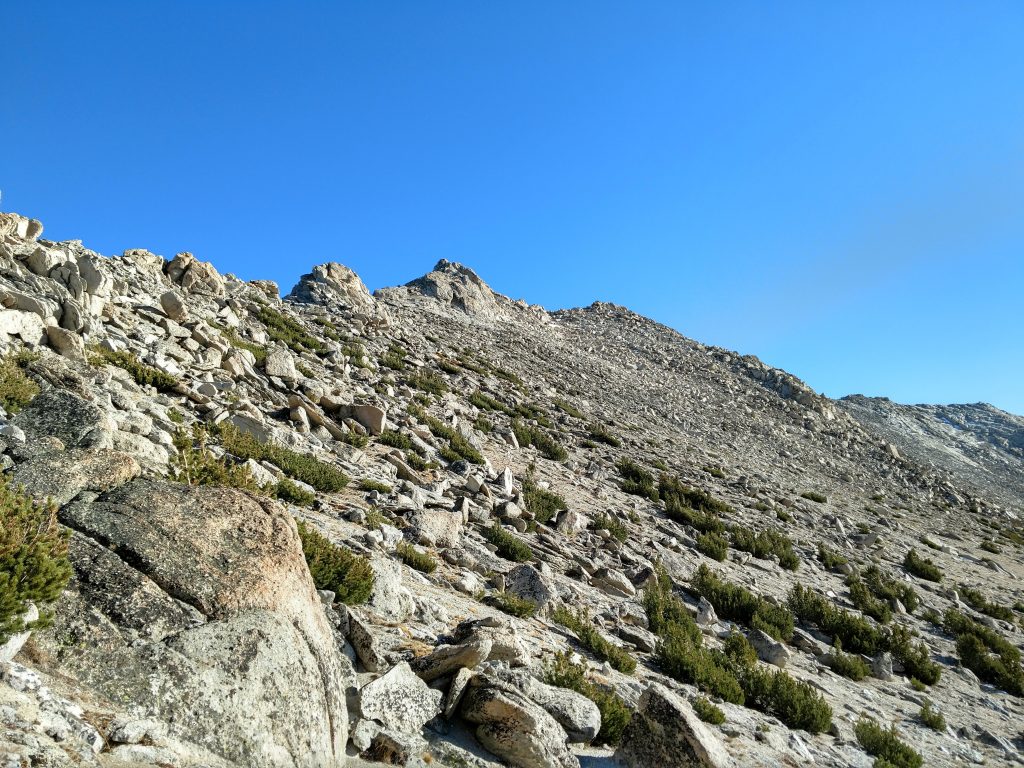
I hiked another 1.3 miles on the well-traveled use path leading towards the summits. At about 10,100', I came to a large, North-east rising ridgeline that serves as a nice "ramp" up to the main route. Here's what it looks like-

Ramp to East Buttress and Main Route
The prominent pinnacle above is the East Buttress and the ridgeline extending to the left in the photo connects with Mt Conness. I scrambled my way up a mix of vegetation and rocks to the notch in the photo above.
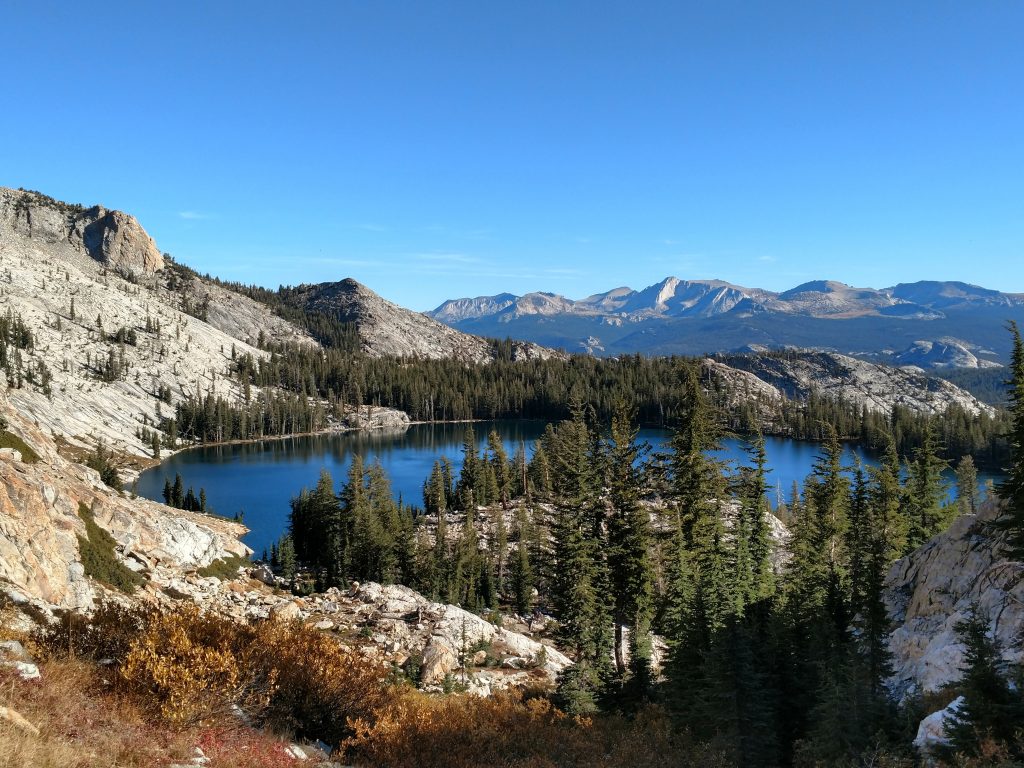
It wasn't too bad- nothing greater than Class I-II scrambling initially. At the vegetation notch (as I'm calling it), I found a non-exposed class III scramble up to about 11,100' and a small, unnamed alpine lake. A few inconsistent cairns marked the way. Here's some more photos-


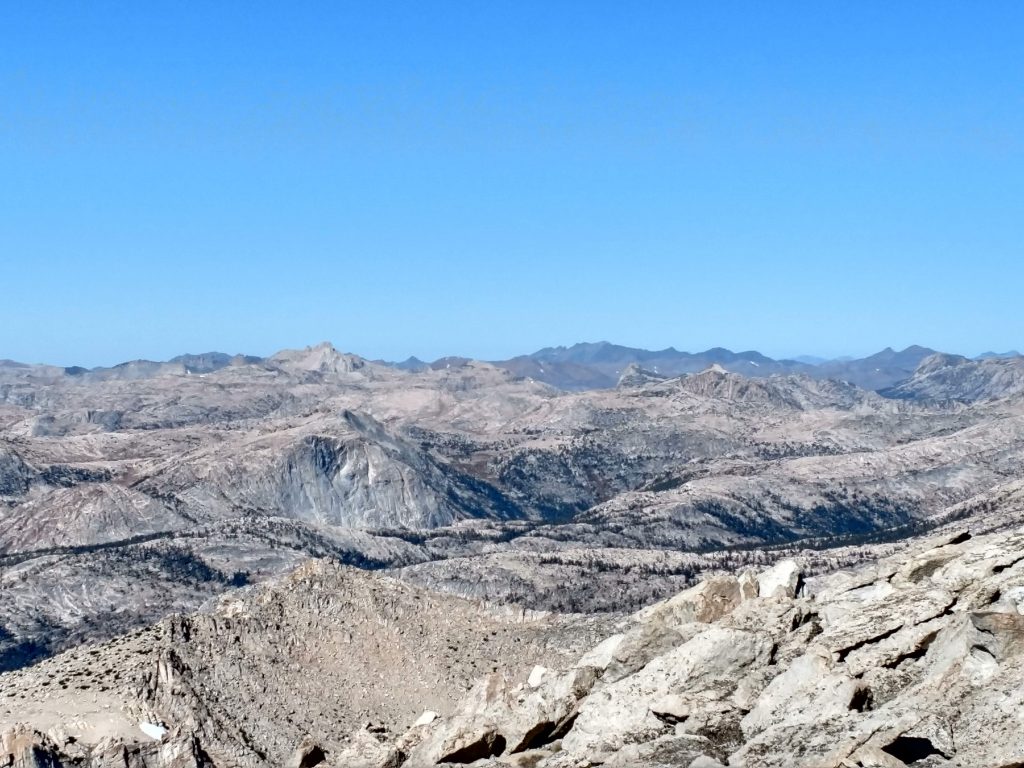
Alpine Lake and Mt Conness East Ridge
At about 11,100', there's a nice, flat section and the main ridgeline becomes visible. I took the path of least resistance involving a steep but clear route up to the next flat "bench" at about 11,800' -


As I was climbing up to the East Ridge, I had differing thoughts about the clear class III route in front of me. From a distance it didn't look obvious and I was worried I would be turned back. However, once on the ridgeline, at around 11,800', the route was perfectly clear.
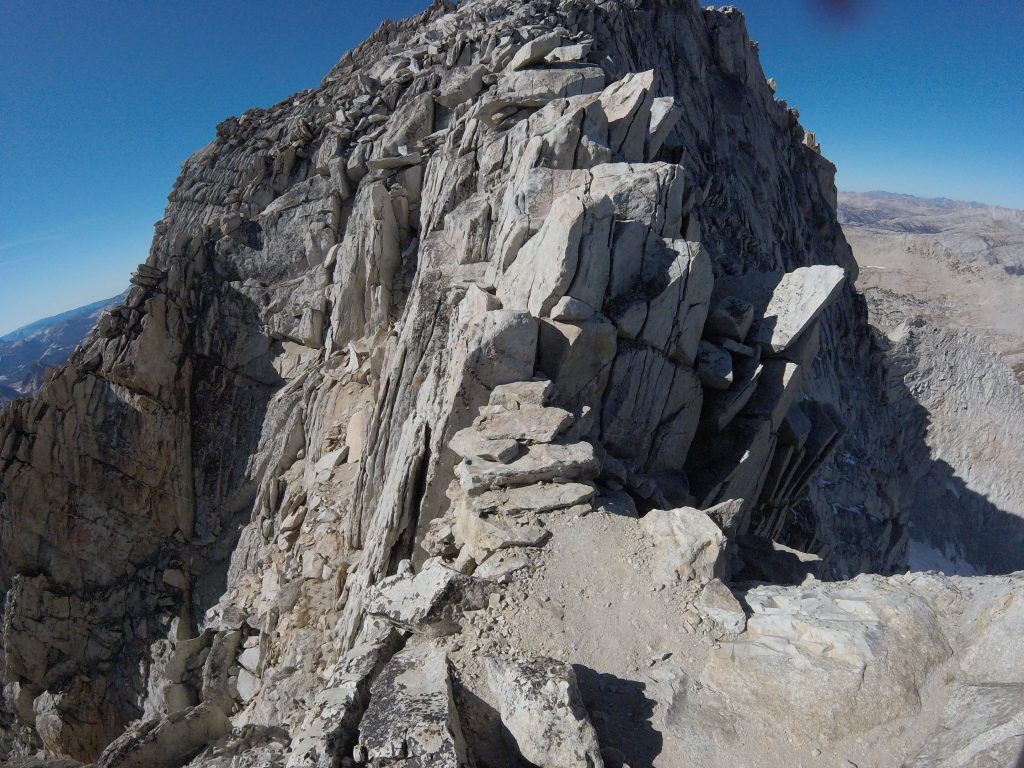
The crux of the route involves the final climb up the East Ridgeline. Its one of the best scrambles I've done in recent memory. The route was very clear and the exposure was minimal. I actually had fun with it. With seemingly less effort than expected, I topped out on the ridgeline and finally caught a glimpse of Mt Conness.

Mt Conness' Final Section
After popping out on top of the ridgeline, I carefully dropped a few waypoints ensuring a clear path of return (in the end, I didn't take that route because I decided on climbing White Peak). However, it would be difficult to find the same path back on return without clear directions.
Before me lay the final summit block of Mt Conness and several famous features. Mt Conness' imposing cliffs have several high-altitude alpine climbing routes that I hope to ascend some day. The west face looked equally daunting and adventurous. Then, there was my clear class III line to the summit-
Everyone who's climbed Mt Conness remarks about this final section. The consensus is that it's very exposed but straightforward climbing. In fact, the ridge-line is so narrow, its nearly impossible to drift off course unless exposed and un-roped Class V climbing is your thing.
It was a 40 minute climb for me. My heart dropped a few times with some of the exposed sections. However I was never far from a good handhold or foot hold. I used a combination of scrambling and hiking poles without much trouble. After about 6 hours of hiking and scrambling, I stood on Mt Conness' summit.

Alternative Descent and side climb of White Peak
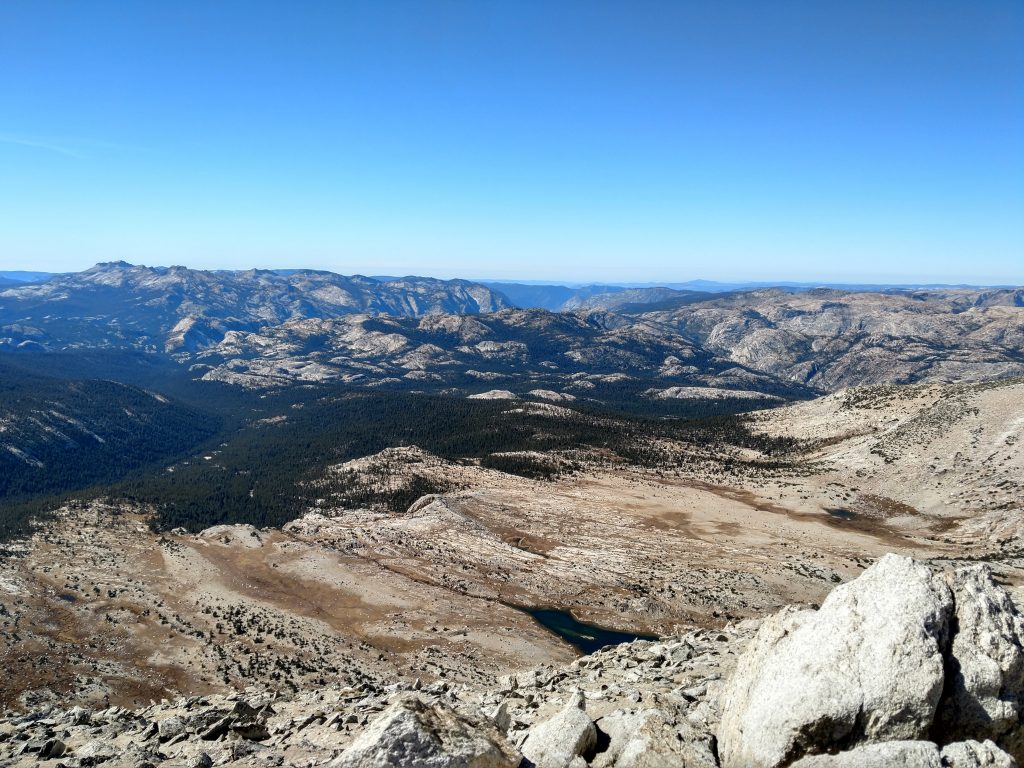
With plenty daylight, I began an alternative descent with intention of climbing White Peak, to the South. I retraced by steps down the thread of rocks and back to the large bowl below the main summit. I picked up another use trail that paralleled the south-oriented ridge line, descending steadily to the saddle at about 11,400'.
As I descended, the route up White Peak became apparent. Again, I went back and fourth whether I should do it. It was only when I reached the saddle that a comfortable route appeared.
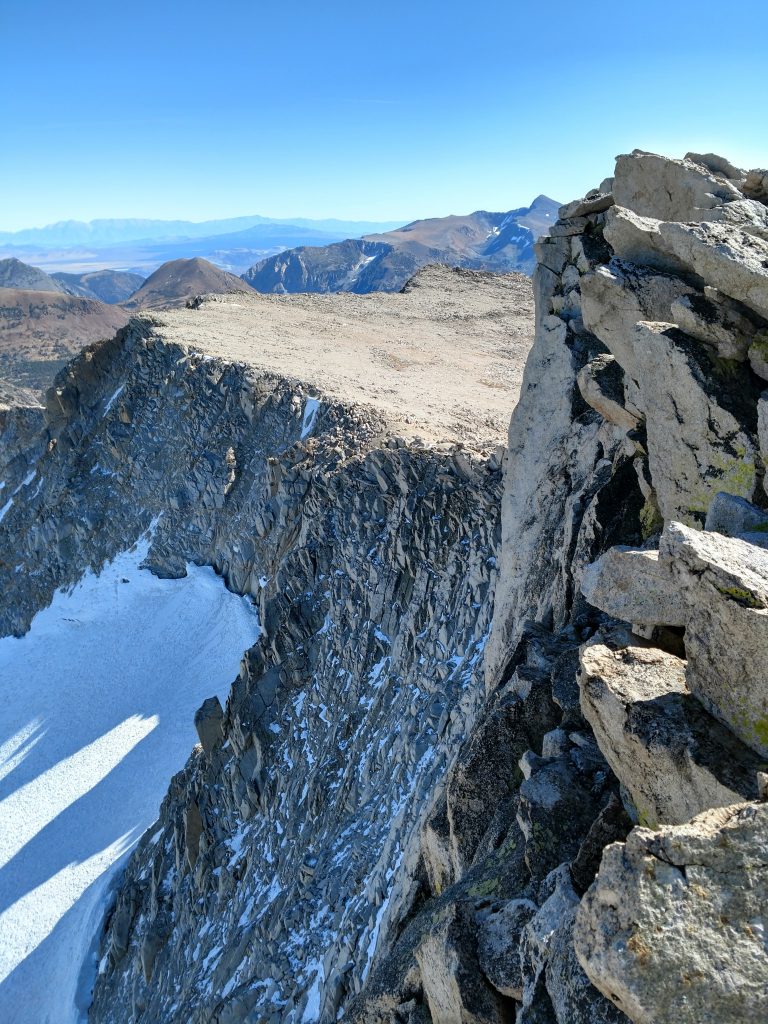
The route up White Peak clearly received less traffic than anything up Mt Conness. On the way up, I found a relatively good route just below the main ridgeline. However, towards the top I got stuck in an exposed and slick slope that made me feel quite uncomfortable. I found a better route down. If you look at the photo above, I preferred essentially taking the route that would run directly through the center of the photo.
White Peak's summit was interesting- there's a yogurt container that serves as a register. Nobody had signed the register in almost 2 months! Clearly nobody cares about this summit which is just as well.

Descent and Return
Again, I ditched the ridgeline descent, finding a far better route which kept the ridgeline about 100 feet above me until returning to the notch.
Descending from the notch back to the original use trail I took in the first place was dicier than I expected. The first few hundred feet were fairly standard Class III down climbing. However, I hit an ice field or unnammed glacier. It can be avoided but it was preferable to endless boulder fields. I was glad I brought traction for my boots and an ice axe. However this descent was far less preferable to simply returning down the East Buttress. Of course, its essentially unavoidable if climbing White Peak.


Once I got below 10,800', I found a flat section and picked up a great use-trail that returned me to the Sawmill Campsite. It was twilight by the time I reached my car.
All things considered, Mt Conness and the East Buttress were exceptional. I don't know what possessed me to climb White Peak but that summit was more forgettable (It doesn't really appear on any major peakbagging lists). If I did it again, I would stick with an out-and-back climb of the East Buttress.
So, for all two dozen people who climb Mt Conness in a given year, hope this report helps!

No Comments